
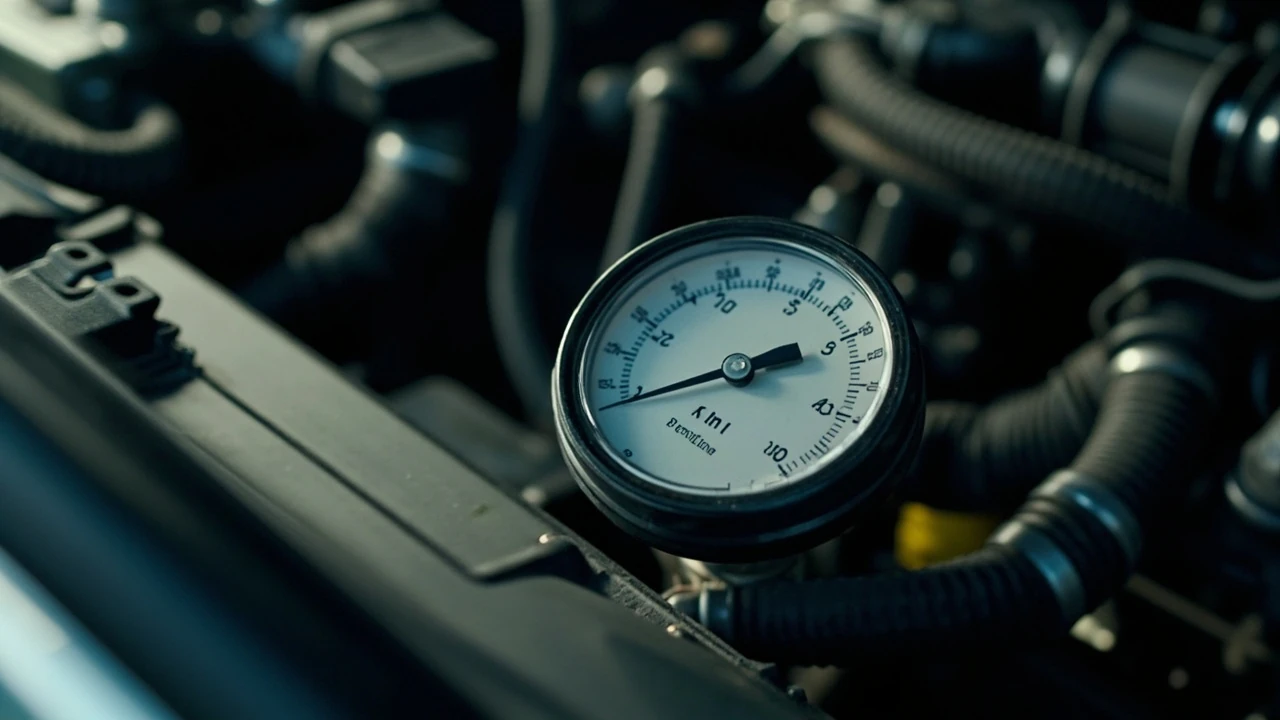

How an oil pressure gauge works and what it tells you
A sudden warning light, a knocking sound from the engine, or a pressure reading that moves erratically should never be dismissed. An oil pressure gauge provides information that a warning lamp cannot: it shows how much pressure the lubrication system is producing while the engine is running. That information helps distinguish a brief reading during a cold start from a sustained problem that could damage bearings or other engine components.
The most accurate oil pressure gauge reading is one compared with the specifications for your exact vehicle. Pressure expectations can vary by engine design, oil viscosity, temperature, and operating speed. A number that looks normal on one engine may be too low on another. For that reason, the owner’s manual is more useful than a generic chart copied from an unrelated vehicle.
Oil pressure is produced by the engine’s oil pump and maintained through a controlled flow path that includes the oil filter, galleries, bearings, and pressure-relief system. The For additional context, engine lubrication fundamentals describe how pressure supports a film between rotating shafts and bearing surfaces. When that film fails, metal-to-metal contact can begin and wear can progress quickly.
Most drivers interact with the gauge in one of three ways: they read the dashboard display, install an individual gauge near the engine, or troubleshoot a warning after the oil-pressure lamp comes on. Each approach has a different purpose. A dashboard instrument is convenient but may not provide the range, logging, or precision required for a detailed diagnosis. A dedicated mechanical gauge can be valuable during testing because it can often be connected to a test port with a hose. An electronic gauge may add peak readings, selectable warnings, and data recording.
This guide focuses on practical interpretation rather than a universal replacement specification. It explains how to read normal conditions, identify changing pressure, choose the right instrument, and decide when further testing or professional service is warranted.
Where the reading should appear on the instrument
Start by learning the scale on the gauge. A conventional mechanical oil pressure gauge usually displays psi, although some metric instruments use bar or kPa. If the face includes both units, confirm that the selected units match the vehicle service information. Do not estimate a reading from the position of the needle while the engine is not running.
Use the vehicle manual to find three useful references: the minimum pressure at idle, the expected pressure during normal operation, and the point at which the engine should be shut down. These values may be given in psi, and they may depend on engine speed or oil temperature. Some manuals list only a minimum specification; that is still useful because it identifies when the reading is too low.
The table below provides a practical interpretation framework rather than universal pressure specifications.
| Gauge condition | What it may mean | What to check |
|---|---|---|
| Pressure rises quickly after start-up and remains steady | The pump is producing flow and the lubrication circuit is holding pressure | Compare the reading with the manual and confirm the oil level is correct |
| Pressure falls and stays low at idle | Possible low-flow condition, oil starvation, or excessive relief-valve bypass | Check oil level, oil condition, filter, pump operation, and pressure specifications |
| Pressure is low at idle but rises with engine speed | The pump may still generate flow, but minimum operating pressure is not being maintained | Continue diagnosis under controlled conditions and follow the manual’s test procedure |
| Pressure fluctuates rapidly | Possible intermittent supply problem, trapped air, loose fitting, or unstable engine operation | Check the hose, fittings, oil level, filter, and engine condition |
| Pressure is unusually high | Possible restricted flow, incorrect oil specification, or a faulty instrument | Verify the gauge and oil grade before opening the lubrication system |
| Needle stays at zero | No pressure is reaching the gauge, the connection is open, or the gauge is not receiving power | Check the test port, hose, fittings, electrical supply, and sensor as applicable |
Many engines produce greater pressure as speed increases because the pump moves more oil. Pressure may also change with oil temperature because viscosity changes. A reading taken during a cold start should therefore not be compared directly with a hot-idle specification. Let the engine reach the conditions stated in the service information, and avoid prolonged idling while trying to obtain a “correct” result.
Do not assume the highest reading is automatically the best reading. Excess pressure can point to a blocked filter, restricted passage, incorrect oil grade, or a gauge error. The goal is not maximum pressure; it is the correct pressure for the engine under the specified conditions.
Why oil pressure changes while the engine is running
Pressure depends on the balance between the amount of oil the pump can deliver and the resistance in the system. If flow is restricted, pressure rises. If the pump cannot maintain flow, pressure falls. Relief valves are part of that control system: they divert excess pump flow when the pressure reaches a set point.
Cold oil is generally more viscous, so a pressure reading may be higher during startup. As the oil warms, it flows more readily and the reading may settle lower. The lowest normal reading commonly appears during hot idle, which is why manufacturers often specify minimum pressure at that condition. Engine speed also affects pump output, so a reading at idle and a reading at higher speed should not be treated as interchangeable.
A change in oil level can affect both flow and the amount of air entering the pump. Too little oil can produce noise, a low reading, or both. An overfilled engine can aerate the oil as well, and the resulting bubbles may create unstable readings. Always use the dipstick or oil-filler procedure specified for the vehicle, including how the vehicle should be positioned.
Air in the system can make pressure less consistent. Foamy oil, a recent oil change performed incorrectly, or a loose oil-filter housing may allow air into the pump area. The presence of air does not always mean a failed pump, but it can make a test difficult to interpret. Before replacing a pump because of an erratic gauge reading, verify that the test equipment does not have air trapped in it and that every connection is sealed.
The type of oil also matters. A grade that is too viscous for the engine or ambient conditions can raise pressure and reduce flow in some circumstances. A grade that does not meet the required specification can contribute to poor protection at operating temperature. The owner’s manual and the oil container’s approved specifications are more reliable than a general rule such as “thicker oil is always better.”
These relationships also explain why a single observation may not identify the failed part. The gauge is a measurement device, not a diagnosis. To determine the cause, combine its reading with oil level, oil condition, engine noise, warning-light behavior, and the vehicle’s service procedure.
How to test an oil pressure gauge correctly
A test is useful only when the gauge, connection, engine condition, and measurement point are appropriate. Before beginning, review the vehicle service information for the test port, engine operating speed, oil temperature, and acceptable pressure range. Some manufacturers specify a fixed engine speed, while others require the reading to be taken under defined conditions. Do not substitute an Internet procedure for instructions written for your exact engine.
Use a gauge with a suitable pressure range and connection for the test port. A gauge that is accurate only at the bottom of its scale may not provide a dependable reading near the upper end. Conversely, an instrument rated much higher than the expected pressure may have poor resolution. Match the instrument range to the manufacturer’s specification and confirm that the gauge and adapter are clean and in good condition.
Follow these steps for a basic mechanical test:
- Confirm the correct engine oil level and inspect the oil for obvious contamination, foam, or an incorrect specification.
- Identify the designated oil-pressure test port in the vehicle service information. Do not remove an unrelated sensor, such as an oil-temperature sender, unless the procedure specifically calls for it.
- With the engine off, install the gauge adapter and hose securely. Hand-tightening may be appropriate for a quick diagnostic connection, but follow the instructions supplied with the equipment and the vehicle procedure.
- Remove any trapped air from the hose and gauge connection if the equipment instructions require it.
- Start the engine and monitor the gauge while keeping the vehicle in a safe location. Increase engine speed only as directed by the manual.
- Record the pressure at the specified speed and oil temperature. Repeat the reading if the result is inconsistent, checking the connection and instrument before drawing a conclusion.
- Stop the engine, relieve pressure in the hose before disconnecting it, and reinstall any component removed for access.
For safety, do not reach into a running engine, remove a fitting under pressure, or stand where hot oil or steam could escape. Loose connections can spray oil across hot components. Have absorbent materials and a safe disposal plan ready if oil spills.
An electronic gauge may require a signal wire, power connection, and sensor installation rather than a simple hose connection. For additional context, Follow its wiring diagram, fuse requirements, calibration instructions, and vehicle-specific sensor location. A powered display with no reading can indicate a wiring or grounding issue, not necessarily zero engine oil pressure.
The For additional context, official vehicle safety and maintenance guidance emphasizes maintaining the vehicle and addressing warning signs rather than continuing to drive with an unresolved problem. That general advice is especially relevant when low pressure is accompanied by warning lights, unusual noise, or visible oil leakage.
What low, high, and fluctuating readings can mean
Start with the simplest explanations, but do not stop after checking the oil level. A correct oil level does not rule out a failed pump, a damaged pressure-relief valve, a blocked filter, or an oil-pressure sensor fault. Diagnostic reasoning should move from visible and accessible checks toward tests that require specialized tools or removal of engine components.
| Observed pattern | Possible causes | Reasonable next step |
|---|---|---|
| Oil-pressure warning light appears with the engine running | Low actual pressure, failed pressure sensor, wiring fault, or incorrect low-pressure setting | Verify oil level immediately, then test actual pressure with a known-good gauge |
| Light appears briefly at startup | Possible delay in oil pressure buildup during a cold start | Check whether the light goes out normally and whether the engine makes unusual noise |
| Mechanical gauge reads lower than the dashboard gauge | Faulty dashboard sensor, wiring issue, or calibration difference | Compare both instruments under the same operating conditions |
| Mechanical gauge reads higher than the dashboard gauge | Faulty dashboard sensor or inaccurate aftermarket gauge | Verify both instruments before replacing engine components |
| Oil pressure is high | Blocked filter or gallery, incorrect oil viscosity, or inaccurate instrument | Confirm the oil specification and test with a calibrated gauge |
| Pressure moves up and down with the engine surging | Vacuum leak, airflow problem, unstable idle, or measurement movement | Record the pattern and diagnose the engine-control problem alongside the pressure reading |
| Oil leaks near the filter, cover, or front of engine | Damaged seal, loose fastener, cracked housing, or incorrect installation | Repair the leak and verify the level before another pressure test |
A knocking or ticking sound may accompany restricted lubrication. If it continues into a brief test at idle, stop the engine. Do not raise engine speed to see whether the sound disappears; doing so can increase the risk of damage when oil supply is already inadequate.
Also separate oil-pressure symptoms from crankshaft-position or knock-sensor noises. A failed sensor can trigger a check-engine light, while an oil-pressure fault often produces a dedicated red warning lamp. The presence or absence of a dashboard gauge can vary by vehicle, so a warning light may be the only built-in indicator.
Common errors during diagnosis include testing with the engine oil level low, using an adapter that restricts the passage, ignoring the specified test speed, and interpreting a gauge with an inappropriate range. Another serious mistake is replacing the oil pump solely because a cheap gauge looks suspicious. Confirm the instrument and connection first, then follow a diagnostic sequence that can identify the actual fault.
Mechanical, digital, and dashboard oil pressure gauges
There is no single best type for every driver. The most useful choice depends on whether you want a quick warning, a test instrument, detailed logging, or factory-style integration. Compare the options by function rather than by the largest display or most dramatic-looking needle.
| Feature | Mechanical gauge | Electronic gauge | Factory dashboard display |
|---|---|---|---|
| Power source | Engine oil pressure | Vehicle electrical system | Vehicle electrical system |
| Typical information | Current pressure | Current pressure, warnings, peaks, or data | Current pressure or a simple warning |
| Installation | Usually a hose, adapter, and test port | Typically requires wiring and a compatible sensor | Installed by the manufacturer |
| Best use | Controlled testing and simple troubleshooting | Monitoring, recording, and custom alerts | Convenient everyday awareness |
| Main limitation | Limited scale resolution and no stored history | More complex installation and possible sensor mismatch | May show only a range or provide no numeric reading |
| Calibration concern | Accuracy varies with quality, age, and mounting position | Accuracy depends on the sensor, calibration, and configuration | Uses factory sensing and warning logic |
A mechanical gauge is often the simplest option for a temporary pressure test. It needs no electrical power, so a failed wiring circuit cannot make the reading disappear. Its limitations include a less precise scale, limited warning capability, and the possibility that an inexpensive instrument has not been checked accurately. Mount it where it can be read safely and securely without blocking hoses, controls, or the driver’s view.
An electronic gauge can show a digital value in the units you prefer and may include minimum and maximum readings. Some models can log data or alert you when a selected threshold is crossed. These features are useful for diagnosing intermittent changes, but a polished display does not make an incorrectly placed sensor or bad connection accurate.
A factory dashboard gauge integrates with the vehicle’s warning system and usually offers the least visible clutter. Its usefulness depends on what the manufacturer chose to display. Some vehicles show a numerical reading, some show bars or a range, and others provide only an oil-pressure warning lamp.
When comparing aftermarket instruments, prioritize a pressure range appropriate for the vehicle, readable scale or display, accurate calibration, durable construction, and compatible fittings. Features are secondary to correct measurement and secure installation. Verify that the selected sensor and adapter are designed for the intended test port and that the installation does not weaken any factory component.
Installing or replacing a gauge without creating new leaks
Installation quality matters because a gauge placed in the wrong location can distort the reading, and an improperly fitted adapter can turn a diagnostic tool into an oil leak. Work from the vehicle-specific service information and the instructions supplied with the gauge. If the vehicle has no accessible test port, a manufacturer-designed adapter or alternate access point may be required.
Before installation, identify whether the gauge is intended for temporary testing or permanent mounting. A temporary hose connection should be secured so it cannot contact moving or hot parts. A permanent installation needs a rigid or properly supported location, protection from vibration, and access that does not require reaching over the engine while it runs.
Careful installation includes the following practices:
- Use the specified oil and sealing components, and avoid thread sealant where the fitting design does not call for it.
- Clean the test-port area before removing the factory plug so dirt cannot enter the lubrication system.
- Protect the port threads and verify that the adapter does not distort or damage them.
- Route hoses away from exhaust components, sharp edges, belts, fans, and suspension parts.
- Secure the gauge so the face remains readable and the hose has limited movement.
- Check for leaks after the engine has run long enough for oil to circulate, then recheck the oil level.
After reconnecting an oil-pressure sender, check for an electrical fault as well as a fluid leak. The connector should be fully seated, the wiring should not chafe against metal, and the engine should not run with the sender disconnected if that affects warning-lamp behavior. Depending on the vehicle, leaving a sender unplugged may cause the oil-pressure light to remain on even when pressure is normal.
Do not use sealant tape on fittings unless the fitting manufacturer allows it. Incorrect sealing material can alter how the fitting seats, make it difficult to remove, or permit leakage. If a fitting will not seat cleanly by hand, stop and inspect the threads rather than forcing it.
Once installed, compare the new reading with the vehicle’s specification and, when possible, with another instrument. This confirms both the gauge and the connection. It also establishes a baseline for future comparisons. For an oil change or synthetic oil service, understanding the proper oil grade and change interval can help prevent avoidable pressure changes; Synthetic Oil Change: What Drivers Should Know in 2026 explains the variables that affect an oil-change decision.
Common mistakes that produce misleading readings
The instrument is only one part of the test. A correct gauge connected with an incorrect oil level, an unsuitable adapter, or an inappropriate operating condition can still lead to a wrong conclusion. Avoid the following mistakes:
- Ignoring the test conditions. A reading at cold idle, hot idle, and high engine speed is not interchangeable. Follow the conditions specified by the manufacturer.
- Using the wrong pressure range. A gauge that is too small-scale may not resolve the expected value, while one with an excessively high range may be difficult to read accurately.
- Failing to check the oil level. Low oil can starve the pump, while overfilling can introduce aeration and unstable pressure.
- Leaving the engine running unattended. A test should occur in a safe location with the vehicle secured and the driver able to shut the engine down immediately.
- Removing the wrong sender. The oil-pressure sender, oil-temperature sender, and other nearby components may look similar but serve different purposes.
- Assuming the dashboard warning proves mechanical failure. A failed sensor, open circuit, blown fuse, or incorrect gauge configuration can produce a warning by itself.
- Ignoring the oil specification. Viscosity and approved performance standards affect how the oil flows at operating temperature.
- Raising engine speed during a warning. If the engine is making a serious noise or the oil-pressure light remains on, stop and diagnose the cause rather than demanding more pressure from the pump.
Record each test carefully. Note the date, ambient temperature, engine temperature, oil used, engine speed, gauge reading, and whether the oil-pressure light behaved normally. A simple log can reveal whether a reading is consistently low or only appears during a specific condition.
Basic maintenance can also prevent false alarms. Checking fluid levels and visible leaks is part of routine vehicle care. If you need to inspect the battery area while checking under the hood, How to Change Car Battery Safely at Home covers the relevant safety sequence. Keeping the engine compartment clean and serviced also makes leaks and loose connections easier to notice.
After the gauge is installed, periodically compare its indication with the dashboard warning system and inspect the hose or wiring. A mechanical gauge may fog, crack, or lose calibration over time. Electronic gauges depend on secure connectors, intact seals, and compatible sensors. Treat the gauge as another component to maintain, not a permanent guarantee that the lubrication system is healthy.
Frequently asked questions
What is a normal oil pressure gauge reading?
There is no single normal number for every vehicle. Use the minimum and maximum values in the owner’s manual or service information, measured under the specified speed and temperature conditions. A cold-start reading can be higher than a hot-idle reading, so comparing readings taken under different conditions can be misleading.
Should I stop driving if the oil pressure warning light comes on?
Treat a steady oil-pressure warning with a running engine as a reason to shut the engine down safely and investigate. If the light remains on, the reading is low, or the engine makes metallic or ticking noises, do not continue driving. Pull over where possible, switch off the engine, and check the oil level before arranging service.
Why is my oil pressure higher when the engine is cold?
Cold oil is more viscous and can flow less readily, allowing the pressure to rise as the pump works against greater resistance. As the oil warms and viscosity falls, the reading may decrease. This is one reason the manufacturer’s pressure specification often refers to hot idle, where minimum pressure is evaluated.
Can an oil pressure gauge be wrong?
Yes. Mechanical gauges can lose accuracy, become damaged, or have a scale that is difficult to read precisely. Electronic gauges can fail because of the sensor, wiring, power supply, connector, or configuration. If a reading conflicts with the dashboard warning or engine behavior, test with a known-good instrument under the same conditions.
Is a high oil pressure reading dangerous?
It can indicate that oil is not flowing as intended. Possible causes include a restricted filter or passage, an incorrect oil grade, or an inaccurate instrument. Verify the reading and oil specification before replacing parts. Excess pressure can also accompany lubrication-system problems that need prompt attention.
Do all cars have an oil pressure gauge?
No. Some vehicles display a numerical pressure, some show a simple range or indicator, and others provide only an oil-pressure warning light. A dedicated gauge can add visibility, but it does not replace the oil level check or the vehicle’s built-in warning system.
Is a mechanical or digital oil pressure gauge better?
A mechanical gauge is straightforward for a controlled test because it does not require electrical power. A digital gauge can offer better readability, peak capture, warnings, and data logging. The best choice depends on your testing needs, installation skill, and whether the instrument is for temporary diagnosis or permanent monitoring.
Can low oil pressure be caused by a bad oil filter?
Yes. A filter that is incorrectly installed, has a blocked passage, or allows oil to bypass it can affect pressure and flow. Other causes include low oil level, a damaged pump, relief-valve problems, air in the oil, worn engine components, and leaks. Confirm actual pressure with proper equipment before replacing the filter or pump.
How long should an aftermarket oil pressure gauge last?
There is no fixed service life because durability depends on the instrument, mounting, vibration, heat, moisture, calibration quality, and whether it is connected mechanically or electronically. Inspect it regularly for leaks, damaged hoses, loose fittings, cracked faces, fogged displays, and connector problems. Recalibrate or replace it when its readings become doubtful.
What should I do before testing the gauge?
Check the oil level using the specified procedure, inspect the oil and visible components, verify the gauge range and connection, identify the correct test port, and review the vehicle’s test conditions. Clear the work area, protect hot components, and make sure you can shut down the engine immediately if pressure is unusually low or warning signs appear.