
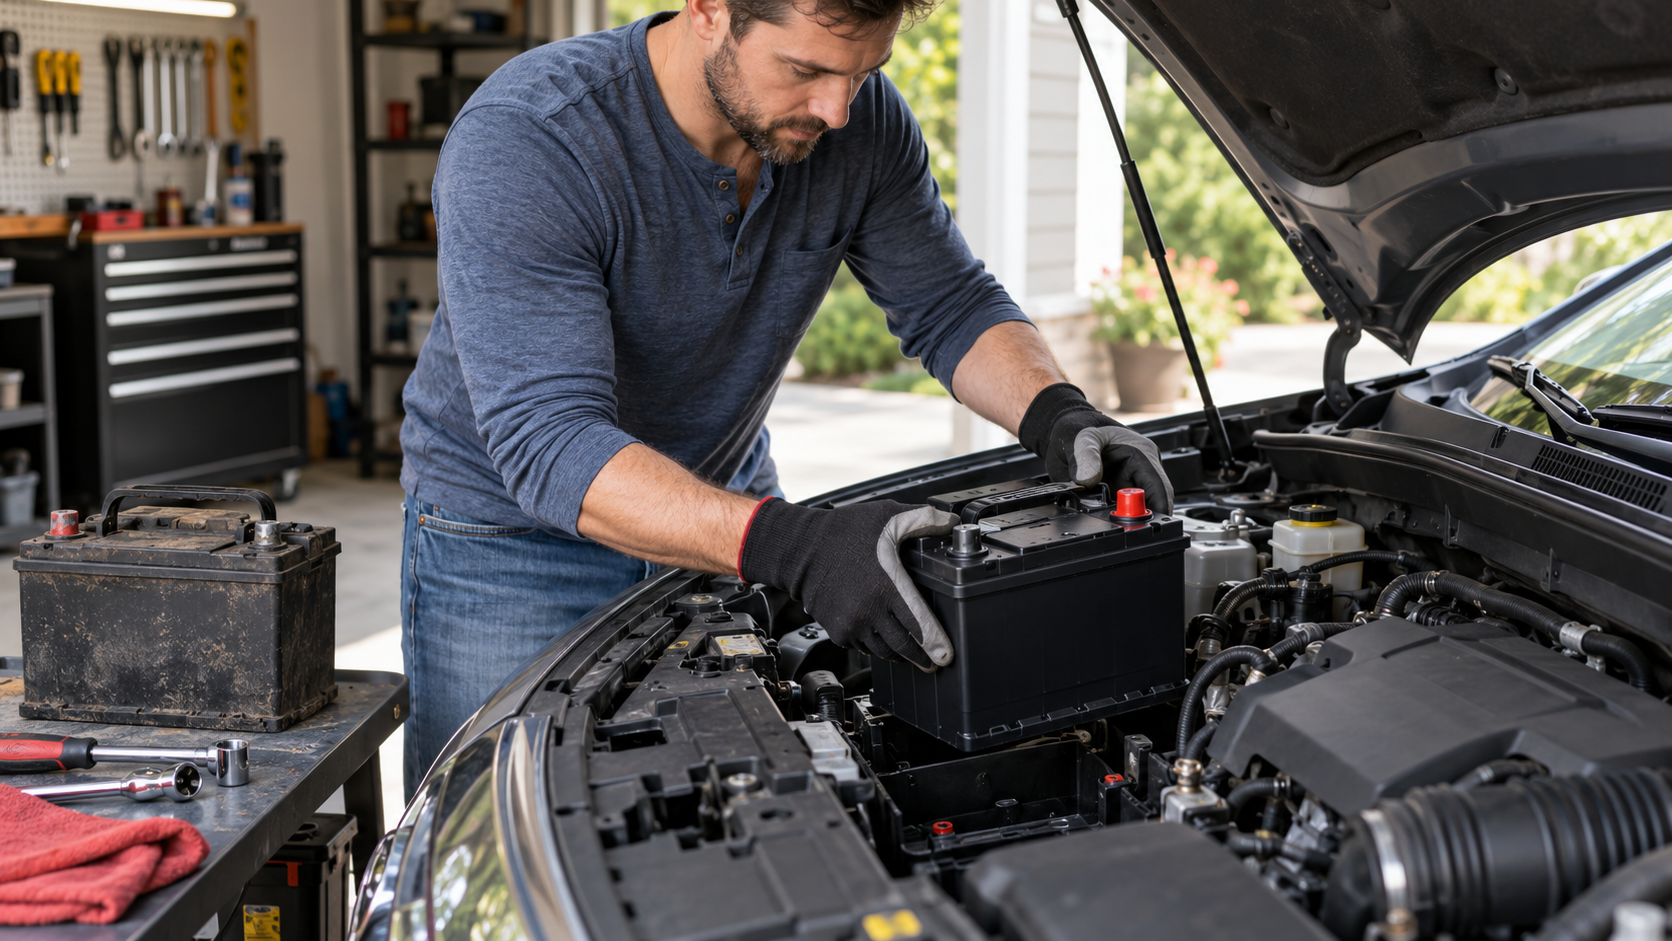

A dead or weak battery has a way of showing up at the worst possible moment.
You turn the key or press the start button. The engine barely cranks. Maybe you hear a rapid clicking sound. Maybe the dashboard lights flicker and nothing else happens.
If the battery has reached the end of its life, replacing it is one of the more approachable car-maintenance jobs you can do at home.
For many gasoline-powered cars, learning how to change car battery is mostly about following the correct order. Disconnect the negative terminal first. Then disconnect the positive terminal. Remove the hold-down, lift the old battery out, install the replacement, and reconnect the terminals in the opposite order: positive first, negative last.
Sounds simple. And often, it is.
But there are a few catches.
Modern vehicles can have battery monitoring systems, electronic settings, security features, start-stop technology, or batteries hidden under seats, in trunks, or beneath panels. Some cars also require battery registration or electronic reset after replacement.
So before touching a wrench, check the owner’s manual for your exact vehicle.
If your car has a straightforward 12-volt battery under the hood, though, the whole job can often be completed in 20 to 45 minutes.
First, Make Sure the Battery Is Actually the Problem
A car that will not start does not automatically need a new battery.
A weak battery is common, but the starter, alternator, electrical connections, ignition system, or another component can cause similar symptoms.
A battery may deserve closer attention when the engine cranks slowly, the interior lights look unusually dim, or you hear rapid clicking when trying to start.
Age matters too.
Many conventional automotive batteries last around three to five years, although heat, cold, vibration, short trips, charging problems, and vehicle electronics can shorten or extend that life.
If the battery is only a year old, replacing it without testing first may simply hide another problem.
A parts store or repair shop can usually test the battery and charging system. A digital multimeter can also give you useful information at home, although voltage alone does not tell the full story about battery health.
What You Need Before Changing a Car Battery
Do not start by removing cables and then discover that the new battery is still at the store.
Have everything ready first.
- The correct replacement battery for your exact vehicle
- Safety glasses
- Protective gloves
- A wrench or socket set, often including 10 mm, 12 mm, or 13 mm sizes
- A ratchet and extension if the battery hold-down is hard to reach
- A battery terminal cleaning brush or small wire brush
- Battery terminal protector or suitable anti-corrosion product if desired
- A clean rag or paper towels
- The vehicle owner’s manual
- A flashlight if the battery is in a dark or enclosed area
Battery sizes, terminal positions, and mounting styles vary.
Do not buy a battery because it “looks about right.”
The replacement needs the correct physical size, terminal layout, voltage, and appropriate performance ratings for the vehicle.
Understanding Battery Group Size, CCA, and Type
The label on a battery contains several numbers, and they are not random decoration.
| Battery Detail | What It Means | Why It Matters |
|---|---|---|
| Group size | Physical dimensions and terminal arrangement | The battery must fit the tray and cables correctly |
| CCA | Cold Cranking Amps | Shows starting ability in cold conditions |
| Reserve capacity | How long the battery can supply power under a defined load | Relevant to electrical demand and backup capacity |
| Battery chemistry | Flooded lead-acid, EFB, AGM, or another approved type | The vehicle may require a specific technology |
| Terminal position | Where positive and negative posts are located | Wrong placement can leave cables unable to reach safely |
| Voltage | Most conventional passenger-car starter batteries are 12 volt | The replacement must match the vehicle system |
Do not downgrade a vehicle that requires an AGM or EFB battery to a basic flooded battery just because the cheaper one fits in the hole.
This is especially important in vehicles with automatic start-stop systems.
The owner’s manual, existing battery specification, or manufacturer parts information should guide the replacement.
Park the Car Before You Start
Work on a flat, stable surface.
Turn the engine off. Put an automatic transmission in Park or a manual transmission in gear as appropriate. Set the parking brake.
Remove the key from the ignition or keep the key fob away from the vehicle.
Why move the key fob away?
Some modern cars wake electronic modules when the key is nearby, a door opens, or the car detects activity. You want the electrical system as quiet as practical while disconnecting the battery.
Turn off the headlights, climate system, radio, and other accessories.
Wait a few minutes before disconnecting the battery if your owner’s manual recommends it.
Where Is the Battery?
Under the hood is still common.
But not universal.
Some batteries live in the trunk. Others are beneath the rear seat, under the passenger compartment floor, or behind covers in the engine bay.
There may also be remote jump-start terminals under the hood even when the actual battery sits elsewhere.
Do not assume the red plastic cap you see in the engine compartment means the battery is directly underneath it.
Check the manual.
How to Change Car Battery Step by Step
Once you have confirmed the correct battery and located the old one, the process becomes much more straightforward.
Take a quick photo before disconnecting anything.
It sounds silly until you are staring at several cables 20 minutes later and trying to remember exactly how they sat around the battery case.
1. Identify the Positive and Negative Terminals
The positive terminal is normally marked with a plus sign (+) and may have a red cover or cable.
The negative terminal is marked with a minus sign (-) and is often connected by a black cable to the vehicle body or engine ground.
Do not rely only on cable color.
Look for the actual positive and negative markings.
2. Disconnect the Negative Terminal First
This is the order worth remembering.
Negative comes off first.
Loosen the clamp nut with the correct wrench or socket. You usually do not need to remove the nut completely.
Twist the terminal gently and lift it off the battery post.
Move the cable away so it cannot spring back and touch the terminal.
Why negative first?
With the negative cable connected, the vehicle body is part of the electrical ground path. If your metal wrench touches the positive terminal and a metal part of the car at the same time, you can create a short circuit.
Disconnecting negative first greatly reduces that risk.
3. Disconnect the Positive Terminal
After the negative cable is safely out of the way, remove the positive terminal.
Loosen the clamp and lift it from the post.
Keep your tools from bridging the positive post to surrounding metal.
Even with the negative cable removed, good habits are still good habits.
4. Remove the Battery Hold-Down
Car batteries are not supposed to bounce around while you drive.
Most vehicles use a bracket, bar, clamp, or base plate to secure the battery.
Remove the hold-down hardware and place the pieces somewhere safe.
A magnetic parts tray is handy here, but a simple cup or small container works too.
Do not lose a bolt in the engine bay.
Cars have a mysterious ability to swallow hardware forever.
5. Lift the Old Battery Out
Now comes the physically awkward part.
Car batteries are heavy. A typical one can weigh somewhere around 30 to 50 pounds, and some are heavier.
Keep it upright while lifting.
Use a built-in handle if the battery has one. If it feels too heavy or the battery sits in an awkward position, get help instead of risking a back injury or dropping it onto the car.
Do not tilt or throw the battery around.
Traditional lead-acid batteries contain corrosive electrolyte.
Check the Battery Tray While It Is Empty
This is your chance to look at an area you normally cannot see.
Check the tray for corrosion, dirt, moisture, damaged hold-down hardware, or obvious rust.
Clean loose debris before installing the new battery.
If you see severe corrosion or evidence that the old battery leaked, deal with that before simply dropping a replacement on top of the mess.
A damaged tray may also need repair.
Clean the Battery Terminals
White, blue, or greenish crust around battery connections is corrosion.
That buildup can interfere with electrical contact.
With the battery disconnected, terminal ends can be cleaned using an appropriate terminal brush and battery-cleaning product.
Wear eye protection and gloves.
Avoid breathing dust from heavy corrosion, and do not casually scatter it around the engine bay.
If the cable terminal is cracked, badly eaten away, or will not clamp securely, cleaning alone may not be enough. The terminal or cable may need repair or replacement.
Install the New Battery in the Correct Direction
Before lowering the replacement battery into place, compare it with the old one.
The positive and negative terminals should be in the correct positions.
The case should fit securely in the tray.
Do not force cables to stretch across the top of a battery that has its terminals reversed from the original configuration.
Place the new battery upright in the tray.
Make sure it sits flat.
Reinstall the Hold-Down
Secure the battery before reconnecting everything.
The battery should not slide or bounce around in normal driving.
At the same time, do not attack the hold-down with maximum strength.
Battery cases are plastic. Excessive force can damage them.
Use the vehicle manufacturer’s torque specification when one is provided.
Reconnect Positive First, Negative Last
Installation reverses the removal sequence.
This time, positive goes on first.
Then negative goes on last.
- Place the positive cable fully onto the positive (+) battery post.
- Tighten the positive terminal so it is secure and cannot rotate by hand.
- Replace any positive-terminal protective cap.
- Connect the negative cable to the negative (-) post.
- Tighten the negative terminal securely.
- Check that neither terminal is loose.
The connection needs to be snug and secure.
It does not need to be tightened like a suspension bolt.
Overtightening can damage a terminal clamp or battery post.
Why the Connection Order Matters
The easiest memory trick is this:
Remove negative first.
Install negative last.
That keeps the vehicle ground disconnected while you are working around the positive terminal.
Reversing that habit can turn one accidental touch of a wrench into a dramatic shower of sparks.
Nobody needs that much excitement during an oil-and-coffee Saturday morning.
What Happens When You Reconnect the New Battery?
Some vehicles react immediately.
You may hear relays click. Interior lights can turn on. An alarm may chirp. The clock may reset.
That is not necessarily a problem.
Start the vehicle and check the dashboard.
Some warning lights may appear temporarily while electronic systems relearn values. Steering-angle or stability-control warnings on certain vehicles may clear after the car is driven a short distance or the steering is turned through its normal range.
But do not simply ignore warning lights that remain on.
If a warning persists, check the manual or have the vehicle scanned.
Will You Lose Radio, Window, or Seat Settings?
Possibly.
Disconnecting the 12-volt battery can reset clocks, radio presets, trip information, power-window initialization, seat memory, sunroof settings, and other stored preferences on some vehicles.
Older vehicles can also have anti-theft radios that require a security code after power is lost.
Check this before disconnecting the old battery.
Searching the glove box for a radio code after the screen already says “CODE” is less fun than checking first.
Should You Use a Memory Saver?
A memory saver supplies low-voltage power to selected vehicle circuits while the main battery is disconnected.
It can help preserve certain settings.
But it is not always necessary, and it adds another electrical connection to the process.
Some manufacturers specify particular procedures for battery replacement, especially on electronics-heavy vehicles.
Follow the vehicle manufacturer’s procedure rather than assuming every car should have a memory saver attached.
If you are uncomfortable with that part, having a shop replace the battery is perfectly reasonable.
Some Cars Need Battery Registration
This is one of the biggest differences between changing a battery in an older car and changing one in some modern cars.
Vehicles equipped with intelligent battery management may track battery age, charge state, and charging behavior.
After a new battery is fitted, the vehicle may require battery registration, adaptation, or coding with a scan tool.
This tells the charging system that a new battery has been installed.
Whether this step is required depends on the vehicle.
If your car requires registration and you skip it, the battery-management system may continue using charging assumptions based on the old battery.
That is why the owner’s manual, service information, or a knowledgeable shop matters.
AGM and Start-Stop Batteries Need Special Attention
Automatic start-stop systems place extra demands on the battery.
Many such vehicles use AGM or EFB batteries designed for frequent engine restarting and deeper cycling than a basic starter battery.
If the car came with AGM and the manufacturer requires AGM, replace it with the appropriate AGM battery.
Do not install a cheaper conventional flooded battery merely because the dimensions match.
The charging system and expected workload may not suit it.
How Long Does It Take to Change a Car Battery?
| Situation | Typical DIY Time | Difficulty |
|---|---|---|
| Battery clearly accessible under hood | About 20-30 minutes | Easy to moderate |
| Battery under a simple plastic cover | About 30-45 minutes | Moderate |
| Battery in trunk or under seat | About 30-60+ minutes | Moderate |
| Battery requires multiple panels removed | 45-90+ minutes | Moderate to difficult |
| Vehicle requires electronic battery registration | Physical replacement may be quick, but scan-tool procedure is also needed | Vehicle dependent |
The actual cable removal may only take five minutes.
It is everything around the battery that makes some cars annoying.
What If the Battery Terminal Will Not Come Off?
Do not pry aggressively against the battery case.
A terminal can seize onto a battery post because of corrosion.
After loosening the clamp fully, gently twist it from side to side.
A proper battery-terminal puller can help with a stubborn connection.
Avoid hammering on battery posts or levering against the case.
Remember what is inside that plastic box.
This is not the place for “more force should fix it.”
What If You See Sparks?
A tiny spark when reconnecting the negative terminal can occur because some vehicle electronics immediately draw a small amount of current.
Large sparks, heavy arcing, hot cables, smoke, or a connection that behaves violently are not normal.
Stop.
Double-check polarity and make sure something has not been connected incorrectly.
If you are unsure what happened, do not continue experimenting.
Have the electrical system checked professionally.
Never Reverse the Battery Polarity
This deserves its own section.
Positive connects to positive.
Negative connects to negative.
Reversing battery polarity can cause major electrical damage, including blown fuses and damage to sensitive electronic modules.
Look at the symbols on the battery itself.
Do not rely only on a red or black cable cover, especially on an older vehicle that may have had cables replaced in the past.
What Should You Do With the Old Battery?
Do not put it in household trash.
Automotive lead-acid batteries are highly recyclable and should go through an appropriate battery retailer, auto-parts store, repair facility, or recycling collection system.
In many parts of the U.S., retailers charge a core fee when selling a new automotive battery.
Return the old battery and you normally receive that core charge back or avoid it as part of the exchange process.
Keep the old battery upright during transport.
Place it somewhere stable so it cannot slide around in the trunk.
Common Mistakes When Changing a Car Battery
The job is straightforward, but the same mistakes show up again and again.
- Buying the wrong group size or battery chemistry
- Removing the positive terminal before the negative terminal
- Installing positive and negative cables backward
- Forgetting to reinstall the battery hold-down
- Leaving a terminal loose
- Overtightening battery terminal clamps
- Ignoring heavy cable corrosion
- Failing to check whether the vehicle requires battery registration
- Using a standard flooded battery where AGM or EFB is required
- Throwing the old battery into ordinary trash
Most of these take seconds to prevent.
What If the Car Still Will Not Start?
A new battery does not guarantee a starting engine.
If the replacement battery is charged and properly connected but the car still will not crank, you may have another problem.
Check whether the terminals are fully seated and tight.
If the connections are good, possible causes include a starter problem, ignition issue, fuse, relay, wiring fault, immobilizer problem, or another electrical issue.
If the engine starts but the battery repeatedly goes dead later, the charging system also deserves attention.
An alternator that is not charging correctly can ruin the day of a perfectly innocent new battery.
How Do You Know the Alternator Is Charging?
Once the car starts, the alternator normally supplies electrical power and recharges the battery.
A battery or charging warning light that remains illuminated while the engine runs is worth investigating.
You can also measure system voltage with a multimeter, but normal charging voltage varies by vehicle, battery-management strategy, temperature, and operating conditions.
Modern smart charging systems do not always sit at one fixed voltage.
So avoid diagnosing a newer car from one generic internet voltage number alone.
Can You Change a Battery in a Hybrid or EV?
Hybrid and electric vehicles normally still have a low-voltage battery, often 12 volts, in addition to the high-voltage traction battery.
The low-voltage battery may be serviceable in a way that resembles a conventional car battery, but the procedure can differ substantially by model.
Do not confuse the low-voltage battery with the high-voltage traction system.
High-voltage EV and hybrid components require specific training and safety procedures.
If the battery you are considering touching is part of the high-voltage drive system, that is not a normal DIY car-battery replacement.
Follow manufacturer service procedures and use a qualified professional.
When Should You Let a Shop Do It?
DIY replacement is easiest when the battery is under the hood, clearly accessible, and held in with ordinary hardware.
Professional installation makes more sense when the battery is buried beneath trim, located under a seat, requires system coding, or is part of a vehicle with procedures you are not comfortable performing.
Also stop if you see a swollen battery case, significant leakage, severe corrosion, damaged cables, melted terminals, or signs of overheating.
Those situations deserve more care than simply swapping the box.
How to Help the New Battery Last Longer
A good battery can still have a rough life.
Long periods of sitting are especially hard on modern vehicles because electronic modules continue drawing a small amount of current even when the car is parked.
Frequent very short trips can also leave the charging system with limited time to replenish energy used during starting.
Simple habits help:
Keep the terminals clean and secure. Fix charging-system problems promptly. Do not leave lights or accessories running accidentally. If a rarely driven vehicle sits for long periods, an appropriate smart battery maintainer may help when used according to its instructions.
And secure the battery properly.
Vibration is not good for battery life.
FAQ
Which battery terminal do you remove first?
Disconnect the negative (-) terminal first, then the positive (+) terminal. When installing the new battery, reverse the order: positive first and negative last. This reduces the chance of accidentally shorting the positive terminal to grounded metal.
Can I change a car battery myself?
Yes, on many vehicles. A standard 12-volt battery located under the hood can often be replaced with basic hand tools. Some newer vehicles have harder-to-access batteries or require electronic battery registration, so check the owner’s manual first.
How long does it take to change a car battery?
A straightforward replacement commonly takes about 20 to 45 minutes. Cars with batteries under seats, in trunks, beneath several covers, or requiring electronic setup can take longer.
Do I need to drive the car after replacing the battery?
Starting and driving the vehicle can help confirm normal operation, but a new battery should already be adequately charged before installation. Some electronic systems may also complete relearning procedures during normal driving.
Will disconnecting the battery erase car settings?
It can. Depending on the vehicle, you may lose the clock, radio presets, window initialization, seat memory, trip data, or other settings. Some older radios may require an anti-theft code after battery power is restored.
Does a new car battery need to be programmed?
Some vehicles require battery registration, adaptation, or coding after replacement. This is common on certain vehicles with intelligent battery management. The exact requirement depends on the make, model, battery type, and charging system.
How often should a car battery be replaced?
There is no fixed interval for every car. Many conventional batteries last around three to five years, but climate, driving habits, charging performance, electrical load, and battery type all affect lifespan. Testing is more useful than replacing solely because of age.
Conclusion
Learning how to change car battery is mostly about getting the details right.
The actual process is not complicated on many vehicles.
Turn the car off. Identify the terminals. Remove negative first, then positive. Take off the battery hold-down. Lift the old battery out. Install the correct replacement. Secure it. Connect positive first, then negative.
That sequence handles the basic physical job.
But modern cars add a few questions that did not matter nearly as much years ago.
Does the vehicle require AGM or EFB?
Does the battery-management system need to be told that a new battery was installed?
Will disconnecting power erase settings or trigger a radio security code?
Is the battery even under the hood?
Check those things before removing the first cable.
And do not guess about battery size or chemistry. The replacement needs to match the vehicle’s requirements, not simply fit in the tray.
Safety is equally simple but important.
Wear eye protection and gloves. Keep metal tools from bridging electrical connections. Never reverse polarity. Lift the battery carefully because it is heavier than it looks.
Then recycle the old one properly.
If the new battery is installed correctly and the car still refuses to start, do not immediately blame the replacement. The starter, charging system, cables, wiring, security system, or another component may be responsible.
And if the battery keeps going dead, find out why.
A new battery cannot fix an alternator that is not charging or an electrical draw that slowly empties the battery overnight.
For a simple vehicle, changing the battery yourself can save time and installation cost.
For a car with a buried battery, complicated electronics, or required registration, paying a shop may be the easier call.
Either way, knowing the correct process is useful.
Because the next time the starter gives you that slow, exhausted “rrr… rrr…” sound in a parking lot, you will have a much better idea of what happens next.